How to Make Easy Scrunchies With the Sewing Machine
See how to make a scrunchie with a sewing machine - a super easy sewing project anyone can do. And fun! And there is a size chart for 7 scrunchie sizes, scroll down!
Together with a diy sleep mask diy scrunchies make a great diy gift for teenagers. Let me show you how to make scrunchies - the quick and easy way!
Let's learn how to make hair scrunchie, it's so much fun! And on a side note, if you like diy scrunchies, you'll love these free projects, too:
- How To Make A No-Sew TUTU
- These EasyDiy HAIR BOWS(Video too!)
- 4 free scrunchie patterns - and easy hair ties!
- or 50+ Beginner Sewing Projects (Super EASY!)
This post may contain affiliate links. Thanks for your support. Also, the scrunchie project is part of my free SewEASY Gifts series:
Remember the eighties? Yep, they are back! And scrunchies, too! The defining hairstyle of the 80's and so comfortable! Raise your hand if you are one of those who wore their ponytail with scrunchies nearly all the time! So easy to make, and so much fun!

Plus, teenagers love them, so if you have older kids or grandkids, or teenage nieces, THESE are great as stocking stuffers! Any place, any type of hair - see below the sizing chart to find your perfect scrunchie size for you. Use it to secure a high or low ponytail, or wear it around your wrist like a bracelet.
How To Make A Scrunchie With A sewing Machine
One thing I never realized until this very moment, I have never in my life purchased a scrunchie. It never occurred to me that I could, or should! I could choose any color or material from my mom's fabric stash (thanks, mom!) and the 10-minutes I needed to actually make one never seemed to be a problem to find when I was in school. Or college.
The last diy scrunchie I made was in black velvet, quite a few years ago on a quiet Saturday morning - before I had kids - and I still must have it somewhere, buried under a pile of stuff in the closet.
Now it was time to see how to make scrunchies again, this time for my daughter. She loves them! You don't even need a pattern to make a scrunchie. Let me show you how to diy one in minutes!
Oh, and if you're new to sewing, check out this beginner sewing guide that will help you dive into sewing, or simply check out the basic sewing stitches - these might be enough to get you going.

First, for those of you who like video, I've made a slide-show to get the feeling of how easy it is to sew one:
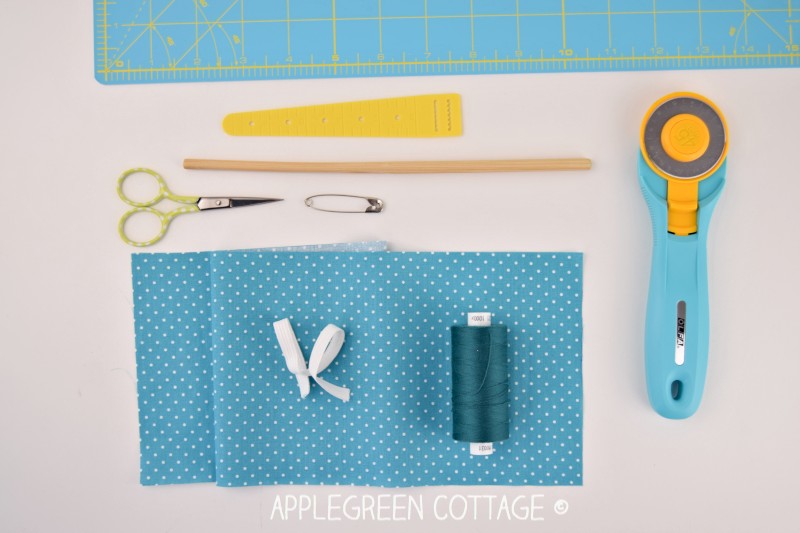
SUPPLIES:
Here's what you need to make a scrunchie:
- fabric scraps the size of 18" by 5"
- a strip of ⅜" (1 cm) wide elastic
- a simple chopstick for turning
- matching thread, a safety pin or an elastic threader
- sewing machine or needle, pins or sewing clips
- scissors or rotary cutter plus cutting mat (I usethis one by Olfa)
What Fabric To Use For a Scrunchie?
Regarding the materials used, you are not limited to cotton. Velvet scrunchies are fairly popular, but you can use any material.
Slippery silk or poly are shiny and give a polished look, but they might be harder to sew with and I don't really like using them because they slip off my head too easily.
And you're always safe with cotton. Poplin works wonders and you can throw it in the washer any time. 🙂

How To Sew a Scrunchie
This tutorial has photos, and if you scroll down to the end of the post, you'll see short, printer-friendly step-by-step instructions you can print. But here, photos:
Step 1 - Cutting directions
1) Cut a piece of fabric 18" by 5" (46 x 13cm). Cut a piece of ⅜" (1cm) wide elastic - max 6" (15cm) long (not pictured)
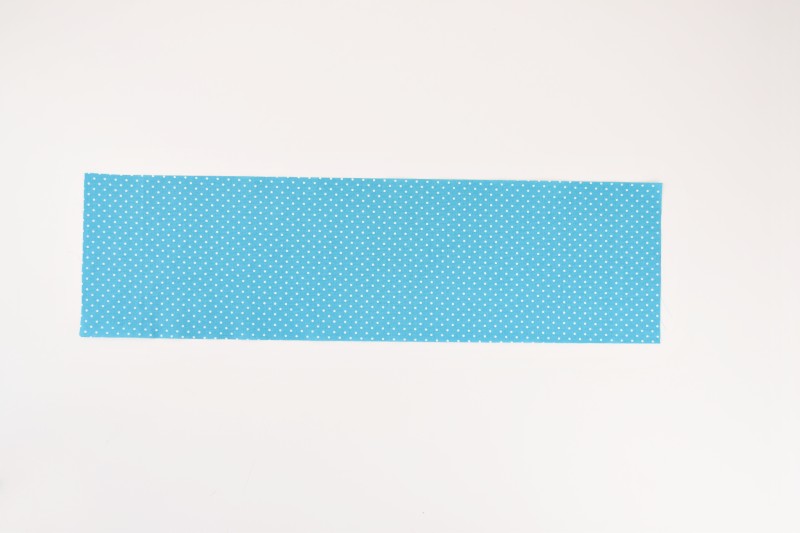
Small scrunchie? Kid-sized scrunchie: 14" by 3" (35 x 8 cm) , 5" (13cm) long elastic. Use the sizing chart below for more scrunchie sizes!

STEP 2 - Finish one short edge
2) Turn under one narrow end of the fabric piece by ¼" (0.7 cm) and topstitch so you create a finished edge.

STEP 3 - Sew A Tube
3) Fold the fabric lengthwise, right sides together and stitch along the long side using a ¼ up to ⅜" seam allowance. Handstitch if you prefer, we as kids always used the simple running stitch and it worked perfectly.

Step 4 - turn Right SidE Out
Can you imagine we're already half way through the how to make a scrunchie instructions!? Now, turn the fabric tube right side out. If the tube is too narrow for your fingers, use a chopstick, or a safety pin. If using a safety pin, attach it to one end and guide through just as you do it when threading the elastic into a casing. Once turned right side out, press the fabric.

Step 5 - Add Elastic And Close
5) Thread the elastic into the casing, using a safety pin or an elastic threader. Stitch the ends of the elastic together with a small overlap (or just tie off a knot!) and then close the opening by joining the two ends of the fabric tube, like this:

Options: machine-stitching one short line. Stitching through all the layers, you'll catch the elastic, too, which is just fine. This is, as you might have guessed, the fastest way. If you have more time, feel free to hand-stitch all the way around to close the opening, using a running stitch or a whip stitch.
6) Finished! Make them in every color you like and choose which one to wear today!

3 Useful Extra Tips About Sewing a Scrunchie
What is the recommended elastic length for a perfect scrunchie for thick hair?
If you have thicker hair, use a longer piece of elastic. Instead of the 6" long for adult scrunchie, I'd recommend going 2" longer and you'll be able to twist your scrunchie twice around your ponytail. So, cut your elastic 8" long.
What are the best sizes for a scrunchie?
Need more scrunchie sizes? I'm happy to help! I'll give you a few more sizing options for your perfect scrunchie.
The length of the fabric will give you the number of ruffles, and the length of elastic affects the number of times you are able to twist your new diy scrunchie around your ponytail. Let me make a list of what worked for me best:
| Fabric Size | Elastic Length | |
|---|---|---|
| Skinny Scrunchie | 18" x 3" (46 x 8 cm) | 6" (15 cm) |
| Regular Scrunchie | 18" x 4" (46 x 10 cm) | 6" (15 cm) |
| Fluffy Scrunchie -My FAVORITE! | 18" x 5" (46 x 13 cm) | 6" (15 cm) |
| Super Fluffy Scrunchie | 20" x 5" (51 x 13 cm) | 7" (18 cm) |
| Kid-Sized Scrunchie | 14" x 3" (36 x 8 cm) | 5" (13 cm) |
| Jumbo Scrunchie | 35" x 5" (89 x 13 cm) | 15" (38 cm) |
| Thick Hair Regular Scrunchie | 20" x 4" (51 x 10 cm) | 8" (20 cm) |
Please note that if you're making a Jumbo scrunchie, it's an oversized scrunchie, the above measurements are meant for thick, coarse or curly hair and it looks like a little headband, enabling you to assemble your thick, curly hair at the top, not squeezing them tightly.
Tip No 3 - You Don't always need to sew the elastic Ends on a Scrunchie
If in a hurry, just tie the elastic ends together, making two simple knots and once they are tight, you're set. Nobody will know, and your scrunchie will be made even quicker!!
To recap, a summary:
What do you need to make a scrunchie?
You'll need fabric scraps the size of 18 by 5 inch, a strip elastic, a simple chopstick for turning, matching thread, a safety pin or an elastic threader, sewing machine or needle, pins or sewing clips, and scissors.
How to make scrunchies?
It's simple. Take a rectangular strip of fabric. Fold the fabric lengthwise, right sides together and stitch along the long side. Turn the fabric tube right side out. Then grab a piece of elastic, thread the elastic into the casing and close the hole. Done!

And for an added bonus, hair scrunchies are way better for your hair than regular hair ties. Your head won't hurt after hours of keeping your hair tied into a high ponytail, and your diy scrunchie will not cause hair breakage like rubber hair bands can. Healthier, more comfortable and more fun.
Not only are they quick and easy, they are great stocking stuffers. Now that you know how to sew a scrunchie, make tons of them - let's sew scrunchies!
xoxo, Damjana - And I'm adding a printer friendly card for you to print and use:
Active Time 15 minutes
Total Time 15 minutes
Difficulty Easy
Instructions
- Cut a 18″ by 5″ (46 x 13cm) piece of fabric, and a 6" (15cm) long piece of ⅜″ (1cm) wide elastic. -> See the tutorial for 6 MORE SIZES HERE!
- Turn under one narrow end of the fabric piece by ¼″ (0.7 cm) and topstitch so you create a finished edge.
- Fold the fabric lengthwise, right sides together, and stitch along the long side using a ¼ up to ⅜″ seam allowance.
- Turn the tube right side out.
- Thread the elastic into the casing, using a safety pin or an elastic threader.
- Stitch the ends of the elastic together with a small overlap (or just tie off a knot!) and then close the opening by joining the two ends of the fabric tube.
Notes
Check out the tutorial for more scrunchie sizes - I added a kids size too. Make them in every color you like and choose which one to wear today!
Source: https://www.applegreencottage.com/how-to-make-scrunchie/
Post a Comment for "How to Make Easy Scrunchies With the Sewing Machine"